Photos by L.G. Patterson
Everyone has their own personal holiday traditions.
Maybe it’s a specific movie or a particular event, like gathering the family for a visit to the Magic Tree. Perhaps it’s volunteering with a local nonprofit, such as the Voluntary Action Center or the Food Bank for Central & Northeast Missouri. (Let’s all remember the meaning of the season and try to give back when we can.)
But I think we can all agree that it’s not really the holidays without cookies.
There’s so many types, flavors, shapes and designs, the opportunities are endless! (And delicious.) But if you’re not a baking pro, it also can seem a bit daunting. So we went to an expert to get a few tips on how to get those cookies looking picture perfect this year.
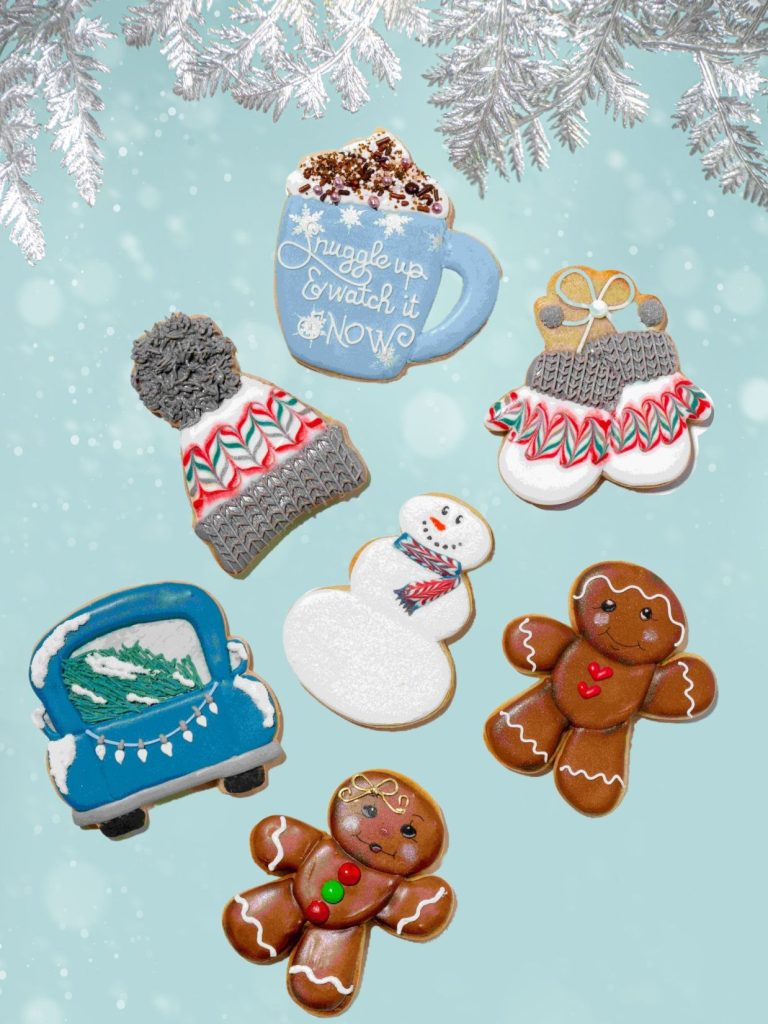
Our expert, Laurel Harlan, started Kiss Me Cookies in 2015. While she mainly focuses on custom cookie orders, you can find some of her beautifully decorated sugar cookies at Plume on Route K.
While the true first step is finding a recipe that works (though we won’t judge if you go for pre-made dough), we will start at the planning phase, beginning with the cookie shape. When it comes to cookie cutters, Harlan says the advent of 3D printers has caused an explosion of designs, so whatever you imagine, you can probably find.
For the particular design itself, Harlan highly recommends drawing it out and getting a good visual of what you want the cookie to look like. “I will literally draw the cutter on a piece of paper and figure out what design, what color is going where, what feature I am going to put where,” Harlan says.
Once you know the design you want to use, you can decide what elements you need. Royal icing is more often used in decorating sugar cookies as it’s easier to decorate with and it hardens well. You can use wet-on-wet designs, where the colors set together creating a uniform surface, or decorate in sections, where you wait until the icing hardens before adding another layer or section. This technique can add depth and detail. “It really depends on the look you’re going for,” Harlan says.
If you’re in a rush and need your icing to set quickly, Harlan recommends putting your oven on the lowest temperature possible and popping your cookies in for five to 10 minutes. That should be enough to get the icing hardened so you can move on to your next step.
Whatever your design, Harlan recommends taking the time to do a little research on royal icing before diving in, as consistency is key and there are several options to consider. “A different consistency will achieve a different thing,” Harlan says.
From there, decide if you need extra embellishments. One trip to a crafts store or a Google search will show you the wide variety of sprinkles, edible glitter and other edible decorations available to really bring that wow factor.
But when all those fancy, glittery embellishments are starting to look more and more enticing, remember that simple is usually better, especially if you’re making a batch of cookies or more. “You really need to limit how much time you’re spending on each cookie,” Harlan says.
Of course, you can opt to take a lot of the work out and simply swing by Plume to pick up one of Harlan’s cookie decorating kits while supplies last. Each kit comes with cookies, icing and sprinkles, as well as pictures of completed cookies for inspiration.
No matter your methods or end results, we hope you remember that simply sharing the experience (or just the cookies) with loved ones is the most important part. Happy holidays from Inside Columbia!
Cookie Decorating Pro Tips
From Laurel Harlan
- When choosing the right cookie recipe, keep in mind that you need your cookies to hold their shape and not spread too much in the oven. It’s recommended to try out a few recipes and pick the one that works best.
- Consider the thickness of your cookie and the ratio to icing. Harlan keeps hers to nearly half an inch (three-eighths of an inch, to be exact) in order to balance the sweetness of the icing.
- To ensure a flat surface to decorate (or to deal with small air bubbles), Harlan suggests placing a piece of parchment paper over the cookies right when they come out of the oven and placing an empty baking sheet on top, gently pressing down.
- Even after sketching out an early design, Harlan recommends getting an edible food marker and drawing the design directly on your cookie. It’ll be all the easier to decorate!
- If you’re having a cookie decorating party, consider preparing the cookies and icings ahead of time. You can prep all of the elements in advance, freeze them and be ready for party time!
- To get that perfect calligraphy look on her cookies, Harlan uses an overhead projector to get an image of what needs to be written in the right font, then simply traces.


