Photos by LG Patterson
There is just something about freshly made tortillas. All it takes is masa, water, a little salt … and maybe a little fat. I know adding fat to corn tortillas is not necessarily traditional, but as you can imagine, it does make them delicious and softer than traditional corn tortillas. You can have the dough whipped in about 3 or 4 minutes, let it rest, and press it out when you are ready to make your tortillas. The tortillas cook up quickly if you toss them underneath a towel to keep warm, fresh, and pliable for when you are ready to make your tacos.
 Masa Harina
Masa Harina is flour made from corn. Masa means dough in Spanish, harina means flour. No, this is not like other doughs, and masa harina is not like other flours made from corn. Masa Harina goes through the process of Nixtamalization. The corn kernels are cooked in an alkaline solution, traditionally lime (the mineral not the citrus). This process helps soften the kernel and remove the outer cover of the corn, but also makes the corn much easier for the human body to process and retains more nutrients. The process also changes the aroma and flavor of the flour.
 Water, Salt, and Fat
Once you get the masa, the rest of the ingredients are pretty simple. You can make tortillas with just water and salt, usually about a 1 to 1 ratio, but the addition of fat can make it so much better. I find it easiest to mix the salt, fat and masa before adding any liquid (some recipes like tamales work great with replacing the water with stock).
Mixing
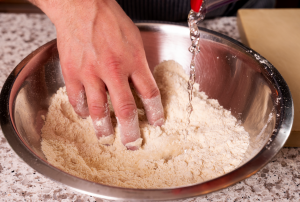
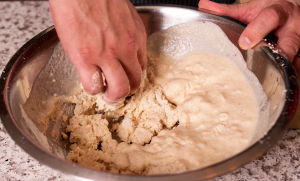
After the salt and fat have been mixed into the masa, the water can be added about a half cup at a time, but reserve the last ½ cup just to see if you need it. The humidity can play a large part in making the dough, sometimes it will take more water, sometimes it will take less. You want the masa to soak up enough moisture. The dough should be soft to the touch but not sticky. The dough needs to rest 30 to 60 minutes before making it into tortillas. I always find this a great time to prepare other ingredients.
Pressing
You can find a tortilla press at just about any Hispanic grocer; they make them in aluminum, cast iron, and wood, but you probably have a “tortilla press” at your house. A heavy-bottomed pan, cutting board or casserole dish will all work to press the masa ball into a tortilla against the counter. Plastic wrap, wax paper or parchment paper will work to prevent the dough from sticking, but anytime I see someone making tortillas they are using a plastic grocery bag. I have used all the above items, and I can’t tell you the science behind it, but the plastic grocery bag works best. The plastic bag is more flexible than the parchment and wax paper, but less sticky than plastic wrap. I like to flatten the bag out then cut down each side parallel to the handles. Then the bottom of the bag still has the seam to fold. Once you have mixed the dough, you can roll it into a sphere. Keep track of the size of the sphere, that way you can scale up for a larger tortilla, or down for a smaller one. The best way is to use a scale (use the grams mode), you can also use a measuring cup or scoop, or just make a mental note of the size (bouncy ball, ping pong ball, golf ball — you probably don’t want to go bigger than that).
Using a tortilla press
Lay the bag, paper, or plastic wrap over the open tortilla press. Place a sphere in the center of the press on the bag, then close the top of the press making sure it is covered with the bag. Place the handle not destroy it. Too much pressure usually results in one side of the tortilla being too thin and tearing when removed.
Using a cutting board or a pan
Lay the open bag on the counter, put a sphere in the center of one side of the bag. Cover with the other side of the bag. Press down with one motion, making sure to keep the cutting board/pan level to the counter. It may take a few tries, but you will push down until you feel some resistance. You can check the thickness and press again harder if needed.
Once the tortilla has been pressed, you can peel back the bag. Pick the bottom section of the bag up, place the bare tortilla into your palm and pull off the top section of the bag. You are now ready to cook the tortilla.
Cooking
Once you are almost ready to start pressing tortillas is when you need to think about warming your pan. If you are making the tortillas (pressing and cooking) by yourself, a medium to medium-low heat should work to do both tasks. If you have a helper to cook or press (or you are quick), you probably want a medium to medium-high heat. You can add just a little bit of oil to the pan, spread with a paper towel, then start cooking. You want to cook for about 30 to 60 seconds on each side, then flip back to the first side. At this point, the dough should cease being the dough and turning into a tortilla. If it has been pressed and cooked properly some of the moisture in the center should be turning into steam and make the tortilla puff. At this point, you are ready to remove the tortilla, place it between some towels and repeat the process.
Timing
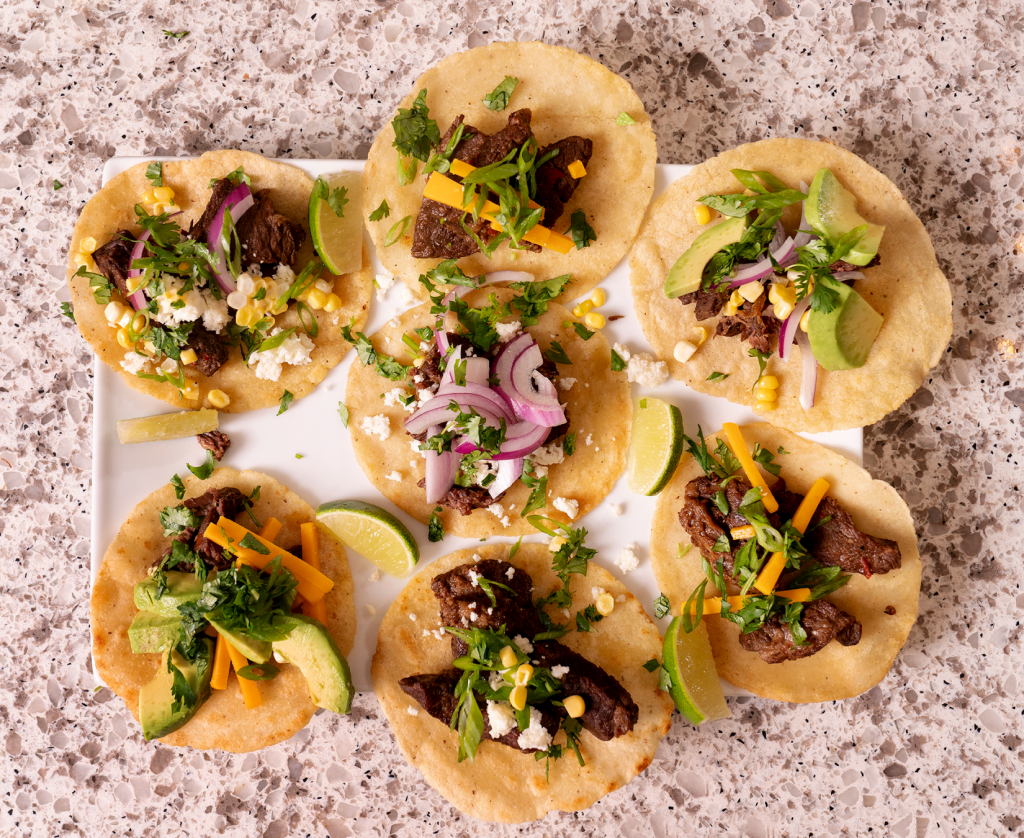
When I am making tortillas, I like to have all other items done first. The meat (see braised meat recipe below), the ingredients (onions, corn, avocados) and the toppings (cilantro, limes, cheese, hot sauce). If you are making tortillas to order or eating shortly after, you can start assembling tacos or letting people assemble their own. Having warm tortillas but nothing to fill them with is not the way to go.
INGREDIENTS
- 2 cups masa
- 1 teaspoon salt
- 2 tablespoons bacon fat or lard
- 1½ to 2 cups warm water
DIRECTIONS
Mix the masa, salt and fat in a bowl. Add about ½ cup of water at a time, then a little at a time until you get a dough that is soft to the touch, but not runny or sticky. Cover with a towel or plastic wrap and let rest at room temperature for 30 to 60 minutes. Prepare your tortilla press/cutting board/pan with a plastic bag, wax paper or plastic wrap. Press tortillas and cook in a pan with a small amount of oil. Place the finished tortillas between towels to keep warm. When ready to assemble, fill with meat and accompaniments as desired.


